

Methods & Margins: Plotting Many Storylines Using Scrivener and ClickUp
The wildly complex but effective way I've been making sure my side characters don't get abandoned

Hello friends,
I’m back from another installment of Methods & Margins. Today I’ve got a very craft-heavy post about how I outline and prep for complex stories with lots of interweaving storylines. If you’ve ever been curious about writing dual timeline novels, this might help you. I also use it for making sure that every member of my large cast of characters has an arc that grows and develops over time. This is really helpful for intricate plots, and I could see it being useful for whodunits too.
I tried so many ways to manage this before landing on my current method. I tried just writing out everyone’s journey in a text document. I tried sticky notes on a wall/whiteboard, which eventually became very unwieldy. I tried just writing the main plot and then going back to the beginning to layer in more storylines later. Inevitably, though, I’d forget to open my document while I was writing, or I’d be writing away from home, and I’d forget to include beats in someone’s storyline. I would get so frustrated in the editing stage because I’d eventually realize someone’s storyline had been dropped, and I needed to go back and find where I forgot about it to add it back in.
Then I figured out a way to track the main plot in ClickUp and everyone’s story arc in Scrivener.
So, let’s hop into it.
As I talked about in part 2 of turning research into a plotline, I rely on the Hero’s Journey method for my story structure. I find it to be a really useful organizing method and helps me keep pacing from flagging too much.
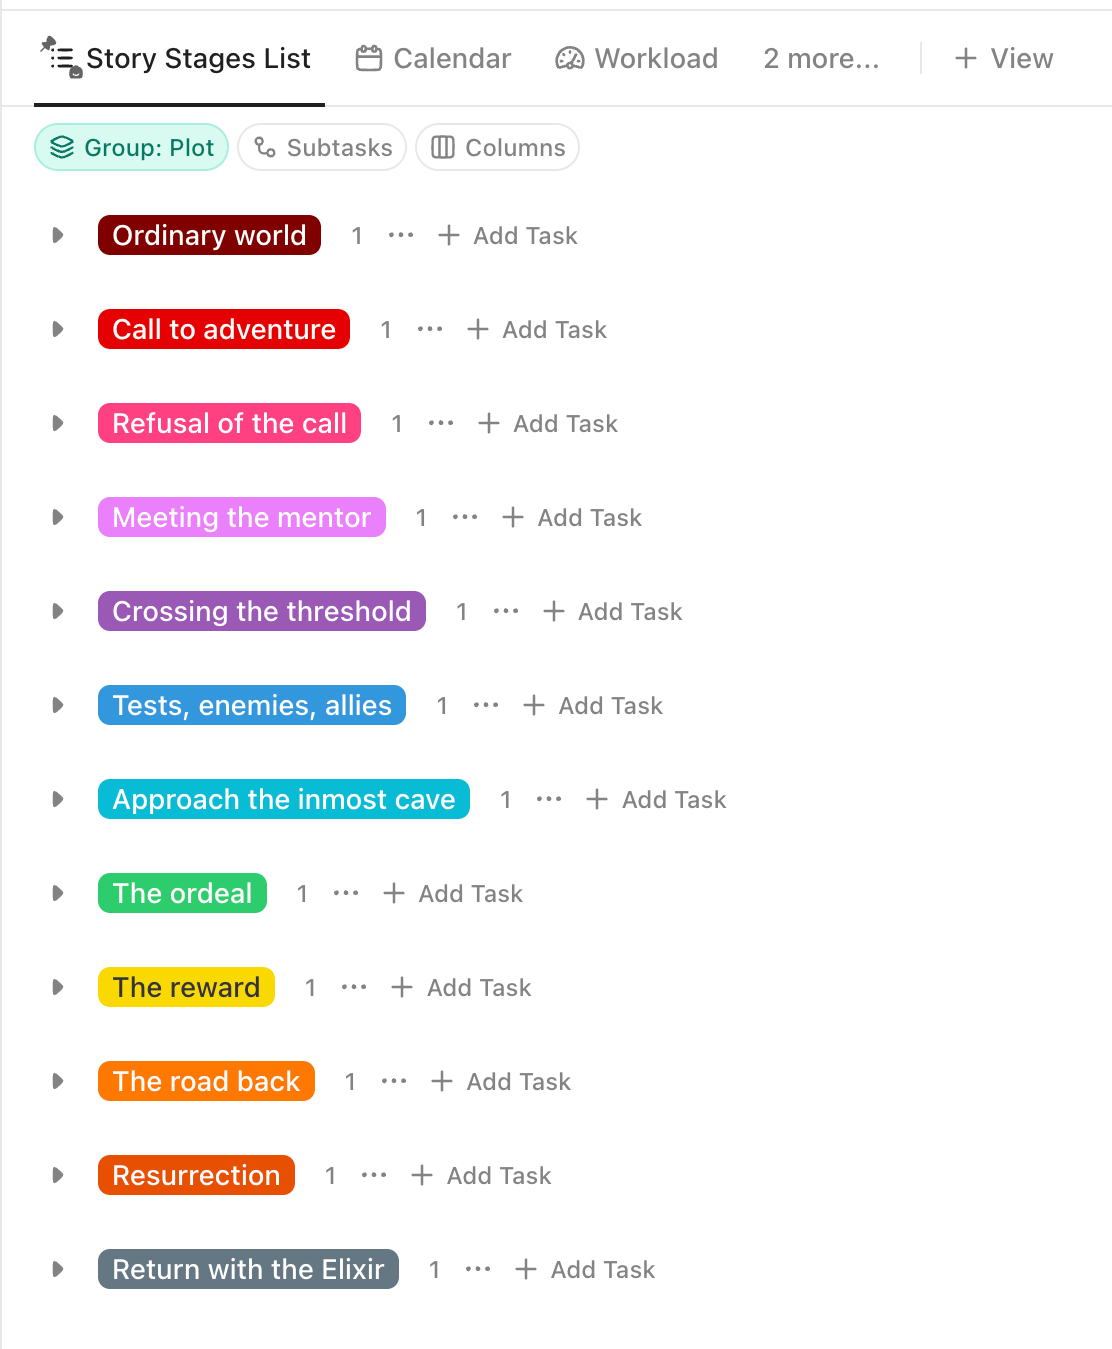
So the first thing I do is I use ClickUp to create a List grouped by a custom field that I titled “plot stage”. The stages I use are each of the steps of the Hero’s Journey—Ordinary World, Call to Adventure, etc.
Then I put input every plot point as a "task” and sort it its story stage. So, for my current WIP, I have things like “Uncle dies” in the Call to Adventure stage. This is what it looks like with tasks in each stage:
Then this is what it looks like with the dropdowns opened up. The Year column helps me maintain how real time is moving compared to the plotline. And the Production Stage is really only helpful if you find yourself rewriting the same part over and over, or if you have to take a long break in editing and can’t remember where you left off.
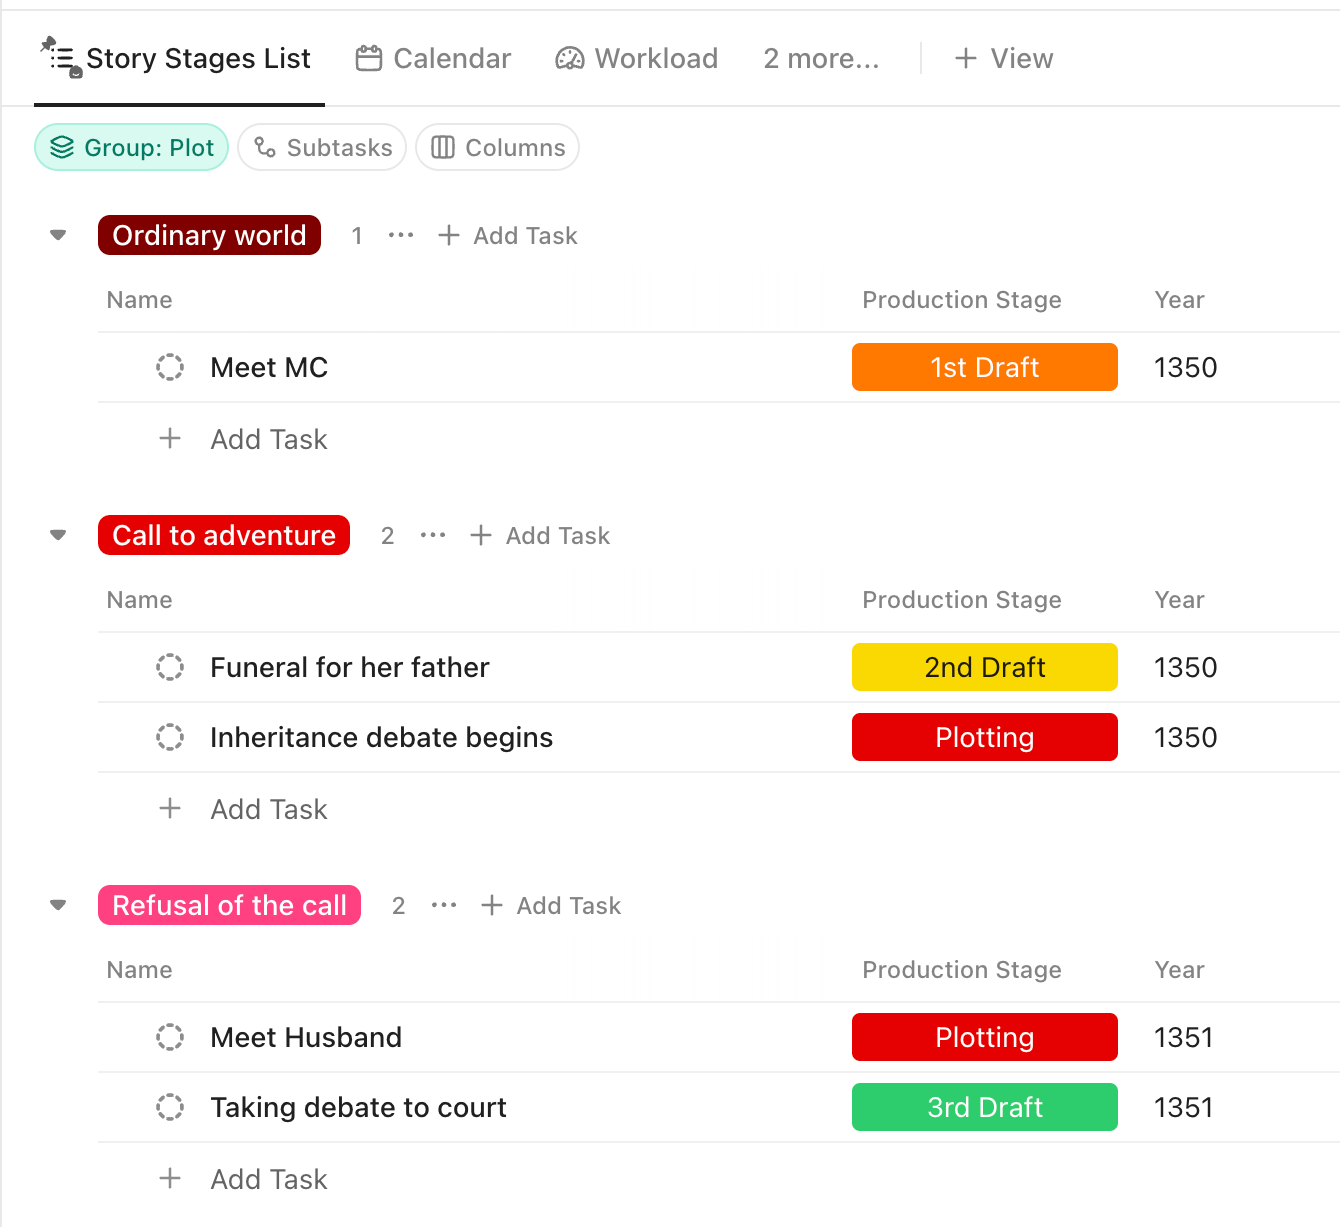
So that’s the main plotting. The key here is that I only include what the main character does and what her primary opponent does.
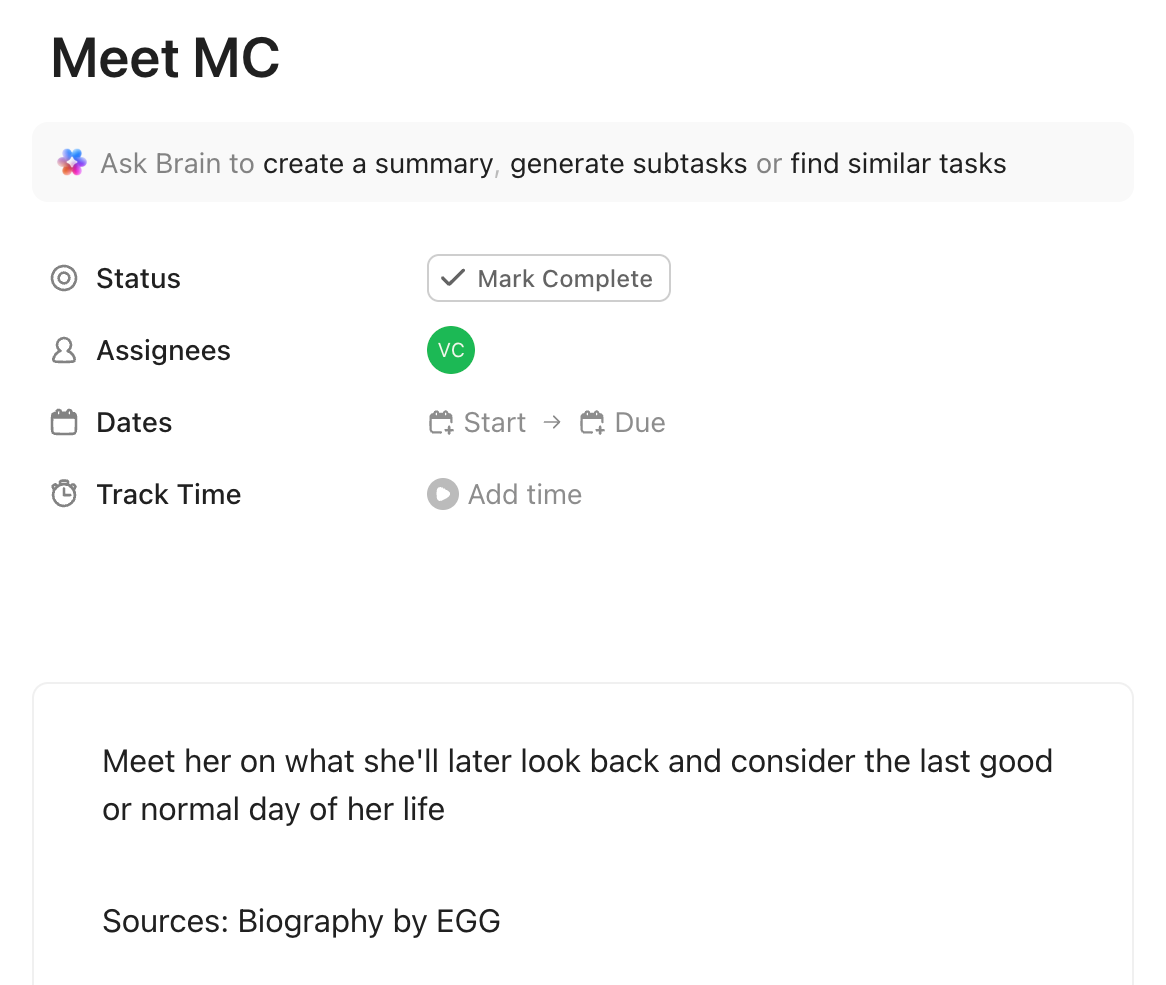
When I open up each task, there are little details inside like what I want the plot point to read like, content I have to make sure I include, ideas I already have, or—and this is really important when you’re writing something that might need to have a bibliography later one—sources.
So that’s how I use ClickUp for plotting. When I’m done with that, I take the plot into Scrivener—and here is where what I do to plot effectively and make sure I’m braiding everything together gets kind of weird.
So Scrivener’s organizing scheme is made up of folders and documents. You can have subfolders if you want, and your whole manuscript goes in a folder aptly called Manuscript.
To organize my plot in Scrivener, I make a document for every main plot point. I usually will not write within that document—the name is important because it shows up like a to do list in the side bar.
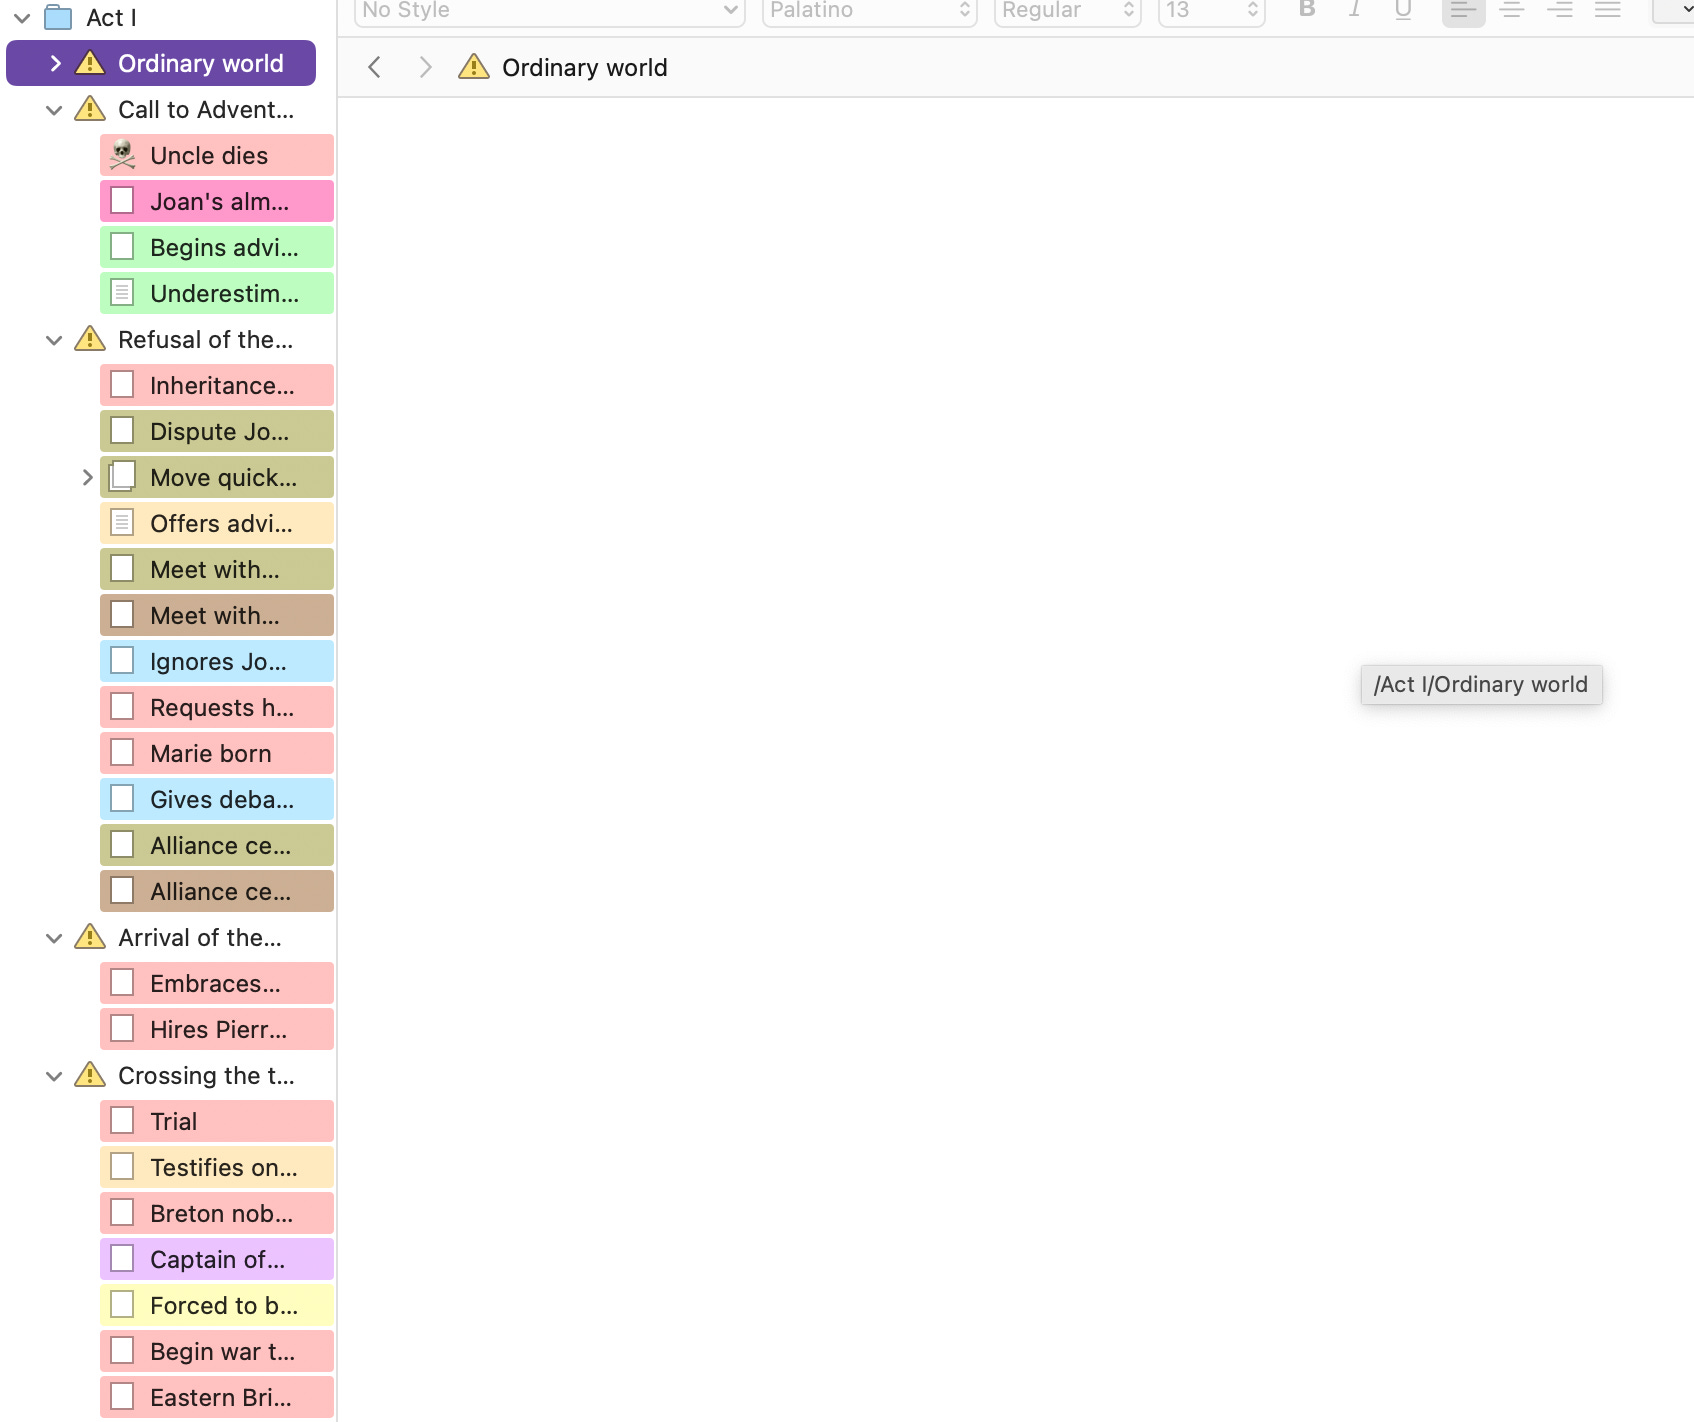
Then, I make a document for each plot point in the villain and each side character’s arc. Often those will overlap with the main story—I’ll get to the in a second. I then color-code each of those documents by the character. To make it easier for me, I usually make a folder for each character and put all of their plot points inside that folder. So you can see an example for my current novel below.
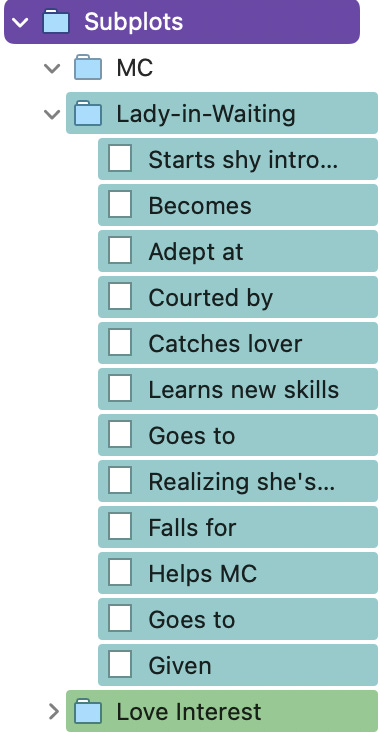
As you can see, each document’s title shows up in the side bar as a vague reminder of each step in the lady-in-waiting’s arc. (You can see another example of that below.) Everything is color-coded so that in the next step, I can tell each document apart.
Once I’ve got every characters arc written out and color coded (and this can take hours), only then do I open up the office Manuscript fodler that is default to every Scrivener project.
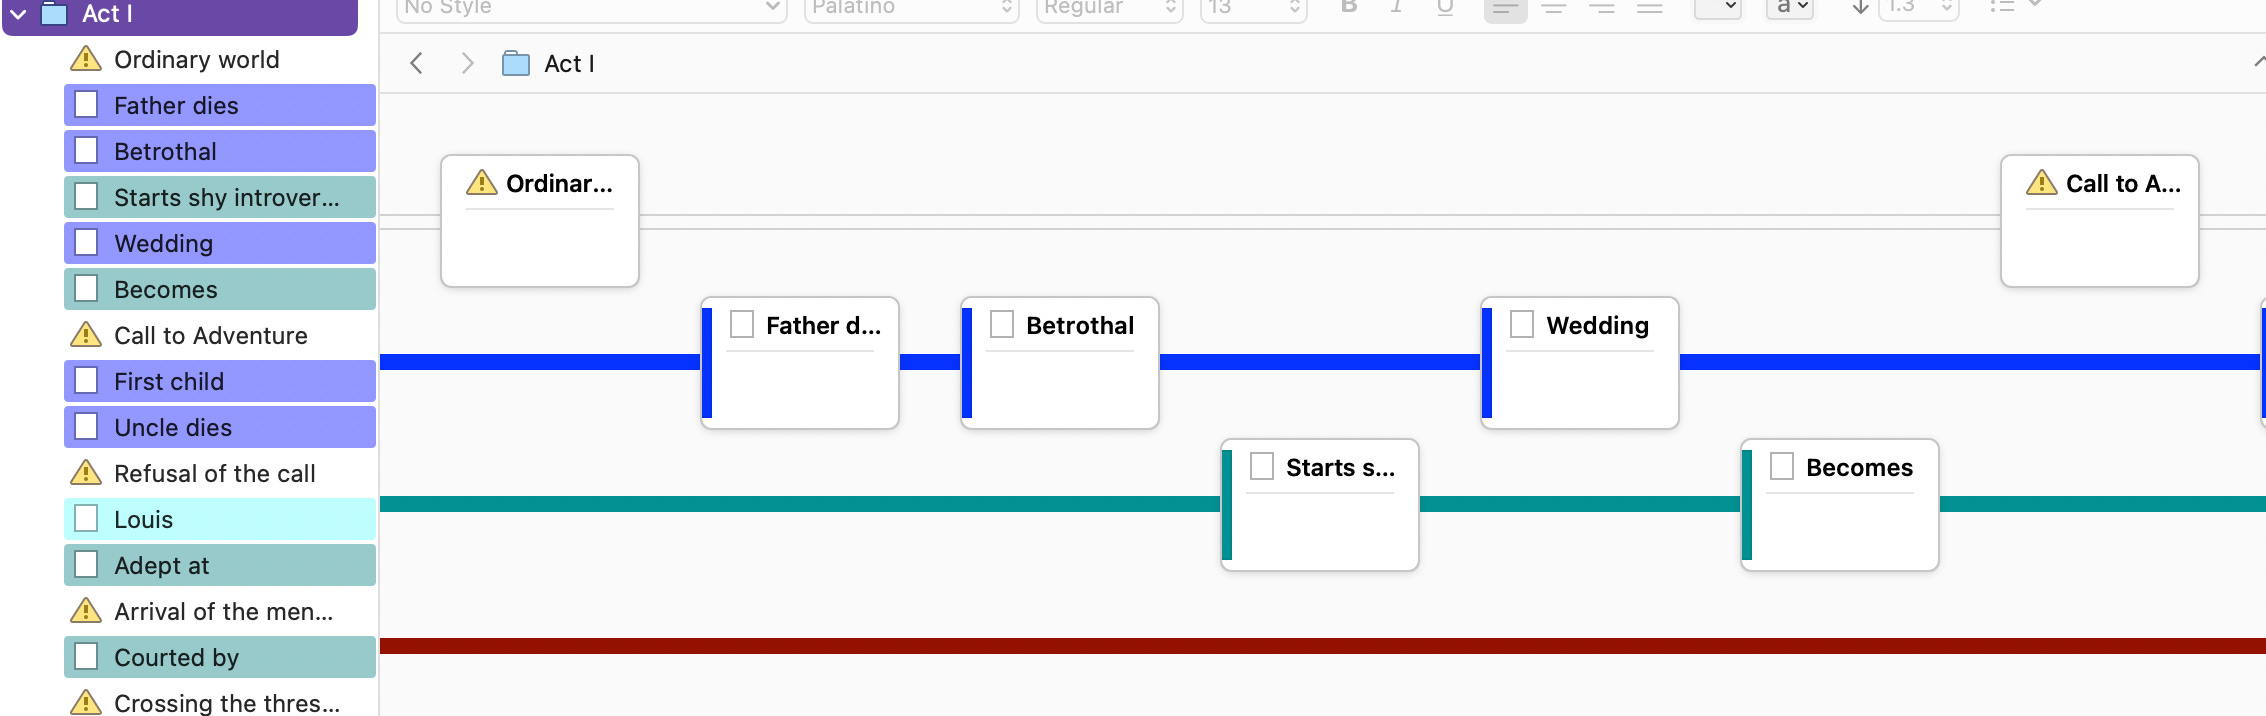
I start with subfolders for Acts 1, 2, and 3. Then I use documents and custom icons to separate out the steps of the Hero’s Journey and where they fall in each arc. Then—and this is where it gets hairy—I duplicate each character’s arc documents and I slot them into where they belong in the journey.
The result is a braided to do list in order of how the novel needs to be written that includes where every character is and what they’re doing. Some of these are going to be duplicates because characters interact with each other. Some of them are going to end up not showing up in the novel at the time because my novel is only told from one character’s perspective, and she doesn’t always know what everyone else is doing. But I as the author need to know.
You can actually see an example of both of these instances in the image below. Just above the “Arrival of the Mentor” yellow exclamation point is “Alliance ce…” twice. This is the moment in the novel when my MC’s two opponents form an alliance against her. She doesn’t witness it so it won’t happen on the page, but she’s aware of both parties separately. I need to remember where their alliance happens so that in “Crossing the Threshold she experiences the 1-2 punch of being forced into a conflict and realizing that they’ve already allied against her.
Is the result of all of this a super long sidebar that it takes forever to scroll through? Yeah, absolutely! But it’s so worth it to make sure I’m not forgetting anything as I write through the novel. It helps reduce some of the time in the editing stage, because I usually know that no side characters’ storylines have been dropped or forgotten halfway through.
You can use other features in Scrivener to see the plot on something like a timeline. I don’t love this feature because I think the cards take up too much room and you can’t see enough at the same time. But it is an option that’s worth knowing about! I prefer the hacked to do list feature in the sidebar.
As I begin to actually write, I’ll write in a document titled “Chapter One” (or whatever), then start deleting each of the subplot documents in the sidebar, like striking them off a to do list. This is why I made sure to duplicate them earlier, rather than moving them from the character’s folder into the Manuscript folder. That way if I need to refer back to the character’s individual storyline, I can do that easily.
So that’s how I use Scrivener to set up my novel! It’s complex and time-consuming, but very worth it in the end. Once it’s done, I start writing!
Going back to ClickUp and my to-do list for the primary story structure before—I don’t always use it much beyond that point. I do like ClickUp for organizing research because it has more organizational options than Scrivener, but you can keep any research, character sheets, or setting sheets you need in Scrivener. The one thing I do use ClickUp for after this part is tracking time in a writing schedule.
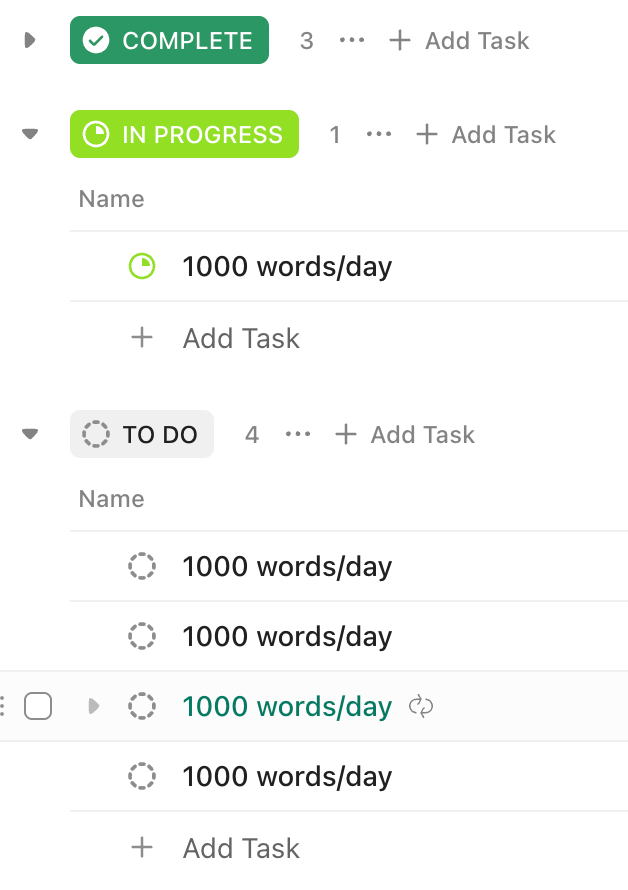
If you’re a disciplined writer and know that you can write for an hour a day five days a week, you can set a recurring task in ClickUp that will block off that time on your calendar, if that’s something you’re into. If you know your writing pace really well, and you know how long your novel might be, you could go so far as to calculate how many days you’ll need to write a novel that long and then make them into tasks by word count, like I have. So above you can see I’m planning to write 1000 words/day, I’ve completed 3 days, and I’m part of the way through day 4. Sometime I actually turn on time tracking, because I think it’s interesting to track exactly how long it takes me to write 1000 words, but that’s not particularly useful for anything.
To be honest, this part is very “efficiency maxing” and I can see how it would be toxic for some people. Don’t do it if you don’t like it! I don’t think it makes you a better writer to be an obsessive planner, this is just what helps me.
All of this is also, it deserves to be said, a way to procrastinate on actually writing. Going through all of this for my new WIP took several days. But going through the process did help me generate ideas for each character’s development! It also let me see in advance how I could set up one character as a mirror for my main character, and another as a foil.
I know this is kind of complex, so let me know if you have any questions in the comments below.
Thanks for sharing! I’ve wanted to take the plunge and start writing my first novel but felt daunted by what’s on offer. You make the process easy to map out. This was so informative and i feel a teeny bit braver.
Thanks for sharing! I’ve wanted to take the plunge and start writing my first novel but felt daunted by what’s on offer. You make the process easy to map out. This was so informative and i feel a teeny bit braver.